lifestyle

Exploring the Ease to Install a New Shed

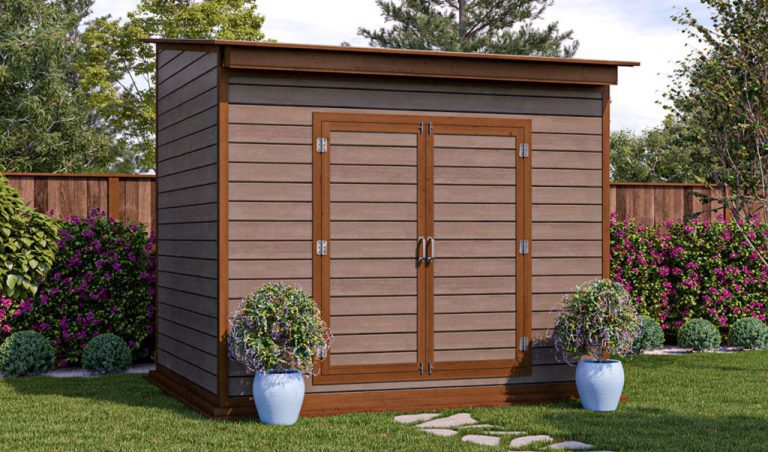
Having that space in your garden to tidy things away is a must for many people in today’s day and age. The much-needed storage space comes in the form of your very own shed. Sheds speak to your practicality and organisation. The nicer the shed, the nicer your garden space

Read More »

Now You’ve Bought A Fixer-Upper, What Comes Next?

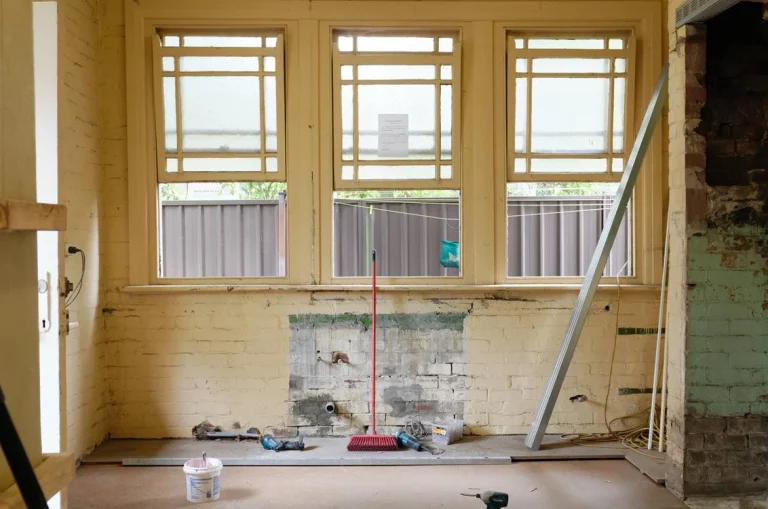
When you purchased your fixer-upper, you must have had some inclination to fix it up. What you’re going to do with it afterwards can be decided at a later date, but for now you need to get it up to standard so that someone can live there, whether it’s you

Read More »

Downsizing into a smaller home: A Guide

There was a point in your life when a larger home was absolutely essential. Whether it was to raise a family or accommodate regular guests, there are years when a big house is full of noise and life, and even the largest of spaces still has a cozy family feel.

Read More »

Kitchen Radiator Trends in 2022

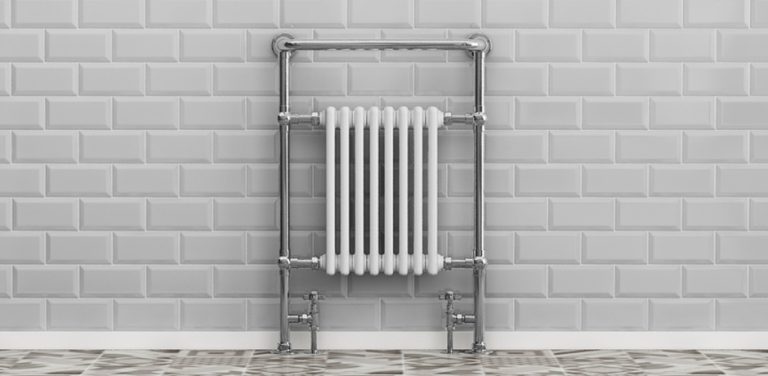
 The function of the radiator is to heat our home space. For decades the radiator design has stayed the same, with almost any changes made to its design. But nowadays, we are often seeing radiator brands that have decided to review their style and make it more elegant and sophisticated

Read More »

Tips on How to Prepare & Maintain Your Lawn for the Summer Season

Summer officially begins on June 21 in the Northern Hemisphere, so there’s still some time to prepare your lawn for the hottest days ahead. Ideally, you’d want to start this process in early spring (or whenever soil temperatures rise to about 65 degrees Fahrenheit), but better late than never, right?

Read More »

Useful Tips for Decluttering Your Home Before Moving

There is a lot of preparation and work to be done before and during moving home. However, it can be the perfect time to declutter, as you don’t want to waste time and money by bringing items with you that you no longer use. Decluttering is even more important if

Read More »

Should You Build Your Own Greenhouse?

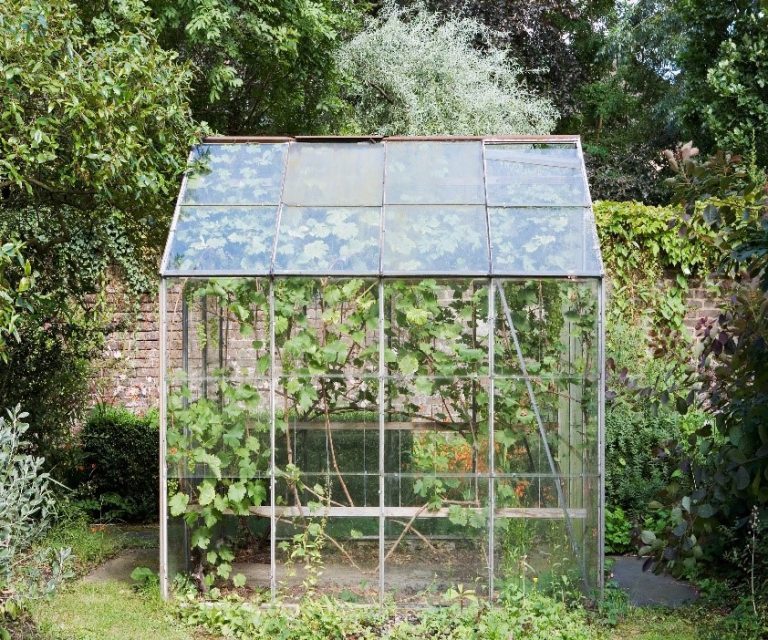
There are many individuals who decide to build their own greenhouse – but this can often be quite a challenging endeavour, especially for those who don’t have much experience in this type of project. From the materials, to leveraging; there are typically several things that you’ll need to consider before

Read More »

Architectural Designer Resume

Do you enjoy envisioning spaces to make them functional and attractive? If yes, you should consider becoming an architectural designer. Some of the responsibilities of an architectural designer include coming up with ideas for homes and buildings. To get a job, you’ll have to write an architectural designer resume. In

Read More »

Which Timber Cladding is Best for Your Garden?

Timber cladding comes in a wide variety of species and finishes, making it confusing to choose the best one for your shed or garden room. The ideal choice would be able to blend beauty with durability. In addition, you’ll want to pick cladding that can stand the test of time.

Read More »
Latest Issue
Issue 324 : Jan 2025

lifestyle

Exploring the Ease to Install a New Shed

Having that space in your garden to tidy things away is a must for many people in today’s day and age. The much-needed storage space comes in the form of your very own shed. Sheds speak to your practicality and organisation. The nicer the shed, the nicer your garden space will look. As a quick reference, Sheds Liverpool is a convenient place to look. What is a Garden Shed Used For? A shed is a small structure with a base, walls and a roof, mean for outdoor garden and backyard spaces. It’s usually used for storage, hobbies and as a workshop. They can vary in size, building material and just about anything else. They may have windows and even electricity. It all depends on how much time, effort and money you can invest in the making of one. Building a shed is now a project that can be completed in a weekend, or even a few hours if you’ve done your research and are well prepared. So, this is how to build a shed yourself. How to Build a Garden Shed Step by Step? A great place to visit for a new shed is SHEDPLANS.org, you can get a full insight on the procedure & protocol of the cost to build a shed here.

Read More »

Now You’ve Bought A Fixer-Upper, What Comes Next?

When you purchased your fixer-upper, you must have had some inclination to fix it up. What you’re going to do with it afterwards can be decided at a later date, but for now you need to get it up to standard so that someone can live there, whether it’s you or someone else. But, how do you go about this? If you’re not sure, then it’s a good thing that we have some knowledge in the area. In this article, we’re going to be taking a look at some of the things that you should do now that you have purchased a fixer-upper. Keep reading down below if you would like to find out more about this. Have A Vision The first thing that you are going to need to do is have a vision. We’re sure that you have already got one based on the fact that you deigned to purchase the property in the first place. Fixer-uppers aren’t exactly the best looking houses on the market, but you’ve got to have vision so that you can see it for what it could be, rather than what it is right now. Having a vision will help you to create a stunning property by the time that you are finished. It’s important to understand here that it is okay to not have the full vision laid out in front of you right now. You are still in the very early stages of owning this property, and there is no rush to get things done right away. If you want to take some time, go into the property and check that it is what you thought it would be like, what you want to do with it and so on, then take the time to do this. Call In The Experts Location Link – CC0 License Once you have some kind of idea in mind as to what you want to do, that’s when it’s time to call in the experts. You are going to need a range of people coming to see the house before you can even hire contractors to begin on any work. For example, one of the most important services that you are going to need is that of building surveyors. They are going to need to check the property for damage, issues with the foundations and other things like this to be sure that the property is safe to work on to start with. If it’s not, then you’re going to have to spend time and money working out how to get it safe. Calling in the experts will give you a good idea as to where you stand in the grand scheme of things. It will either confirm what you thought you knew, or it would give you a new dose of reality. Either way, you have got to know so that you are able to move forward. Sort Out A Budget Now that you know what you’re working with foundation wise, and now that you have some kind of vision when it comes to what you want to do, you can start sorting out a budget. Think about how much money that you have available, and think about how much of it you are willing to spend on this renovation of the property. It tends to be the case that if you’re going to live in it yourself that you are more willing to invest in it, but you also want to see a nice return if you decide to sell or rent it. Sit down with some of the experts and work out how much you are looking at realistically. This will help you make decisions down the line, guide some of the trickier choices as the budget may not even allow for certain things. Just make sure that you have your budget sorted, and then have another number a little higher that is the absolute maximum that you are willing to spend. Start Getting A Plan Together CC0 License – Pexels Credit As soon as the budget is sorted, you can start getting some kind of plan together. Think about where you want walls knocked out, what you want each room to be, what needs updating and so on. All of this is going to take quite a while to sort, so we recommend blocking out a good amount of time to dedicate to this. If you have been doing this kind of thing for a while now, then you might be able to come up with some kind of guiding timeline as well, but this is not necessary so don’t panic if you are unable to do so. Everything will feel better once the plan starts forming. Consult experts on certain areas and see what they have to say, and then look at what materials you want and so on through the house. Ensure that this matches up with your budget, and then you’re good to go. Hire Contractors There’s a plan and a budget, which means that you can start hiring people to make your vision into a reality. Look into people for the plumbing, the electrics, any foundation work that needs to be done, design experts, structural engineers and so on. You will know what you need based on all of the information that you have gotten up to this point, and you have your budget which shows what you can and cannot afford. Before you hire anyone, make sure that you have spoken to a member of the team and looked at reviews from previous clients. It’s easy to lie online, but past customers will have no reason to do so. Hopefully, you have found this article helpful, and now see some of the things that you have got to do now that you have purchased a fixer-upper. This project can turn into one of the best things that you have ever chosen to do, or it can turn into your worst nightmare, but it’s all about

Read More »

Downsizing into a smaller home: A Guide

There was a point in your life when a larger home was absolutely essential. Whether it was to raise a family or accommodate regular guests, there are years when a big house is full of noise and life, and even the largest of spaces still has a cozy family feel. But what happens when you’ve served your parental duties and waved off your children as they set off to start families of their own? Does all of that space still seem important to you, or are you suddenly finding yourself in a large but extremely empty space? Whatever your reasons for wanting a change in scenery, many people are downsizing into smaller, more stylish homes after they’ve made use of the larger places. If you’re considering moving into a smaller space that’s perfect for the next stage of your life, take a visit to websites like Compass.com and see the wide range of options available to you. In the meantime, keep these things in mind as you look to downsize in a new home to make your next move go as smoothly as possible. Reasons to downsize your home While no two reasons to downsize a home will ever be exactly the same, they tend to fall under some of the same broad categories. Perhaps you simply feel that the house has far too much space now the kids have moved out, and you see no point in staying there. This is a perfectly valid reason. After all, who wants to pay large energy bills and have to clean a huge house that’s totally empty? Or maybe you want to downsize to help get some money together for your retirement? Many people choose to sell up and scale down so that they can make the most of their new start in life. It could just be that you’ve never had kids but you want to experience a brand new area, perhaps away from the hustle and bustle of the big city. Either way, downsizing in style is an increasingly popular venture. What will you want in the future? Downsizing your home shouldn’t feel like the end of an era. Instead, it should feel like the beginning of a new adventure. Chances are that you’ve spent the last few decades either raising a family or working extremely hard to succeed in your career (possibly even both!). Think of this as the chance to find your dream home and not a place that’s designed to please others for a change. This should be a space where you can dream big and live with an understated sense of inner happiness. Declutter to reduce moving day stresses Moving from a larger home into a smaller space requires some strict rules about what you’ll take with you and what’s going to be sold at the next yard sale. This is an opportunity to let go of some unnecessary items and random pieces of furniture in favor of taking only the essentials. You don’t want to take it all with you and make moving day an even bigger struggle. Stay realistic about what’s no longer needed in your new place, and look forward to making this smaller space your very own.

Read More »

5 Ways to Ensure Sustainable Living Standards for Residents in a Building

When you think about sustainable living, you probably imagine the benefits of going green, like sticking to a zero-waste lifestyle or ditching the car for public transportation. However, did you know that your home plays an equally important role in preserving the environment? There are many ways to ensure that your building is environmentally safe and livable for years to come. As a landlord, it is your responsibility to maintain certain standards in every apartment, townhouse, or single-family home. So whether you are renting out one building or an entire complex, here are a few ways to keep your residents – and the planet – safe and green. #1 Reduce Indoor Air Pollution Indoor air pollution is a serious health problem. The EPA – Environmental Protection Agency – estimates that indoor air pollutants are at least one-fourth as prevalent as outdoor pollutants and are present in every home, school, and workplace. Indoor air pollution can come from many sources. These include radon gas seeping out of the foundation, mold and dust mites found in carpets and upholstered furniture, and volatile organic compounds (VOCs) emitted by paints or cleaning products. Fortunately, as a building owner or manager, you can prevent indoor air pollution or at least reduce it to some extent.  Use non-toxic materials whenever possible when making repairs or redecorating areas of the building. This includes all the paints used for painting walls or ceilings, flooring materials, adhesives like contact cement, etc. Avoiding the use of toxic chemicals is a sure-to-succeed way to reducing indoor air pollution. #2 Ensure Proper Ventilation Proper ventilation is an integral part of the HVAC system. It helps clean the air in a building and avoid adverse health effects from exposure to contaminants such as mold, pollen, and dust mites. A properly designed ventilation system should provide enough outdoor air so that it can be delivered uniformly throughout all occupied spaces in your building.  In addition to reducing contaminants, adequate ventilation also lowers humidity levels in your building which reduces energy consumption by increasing the efficiency of cooling equipment. #3 Look for Pesticides and Toxins in Drinking Water Toxins can enter our drinking water, which comes from two sources – surface water and groundwater.  Surface water includes lakes, rivers, and streams. Groundwater, on the other hand, is found beneath the surface of soil or rock. Contamination can occur at any point along these routes. These include industrial runoff entering a river and pesticides seeping into the soil from farms miles away from your home. How do you know if there are contaminants in your home’s drinking water?  The easiest way to find out is by requesting an annual test kit from your municipality (or state). Otherwise, pay attention to any signs that suggest something is wrong with your tap. These signs include stains on fixtures, discoloration in faucets/taps, and foul odors coming out of taps when turned on. You can also take legal action if you feel a nearby industry or business is affecting a public water supply. The success of the Camp Lejeune Water Contamination Lawsuit shows how willing the US government is at the moment to ensure safe and sustainable living conditions for its citizens. Thus, wherever necessary, taking legal action is always an option. #4 Ensure Sufficient Natural Lighting Natural lighting is vital for both your health and the environment. Natural lighting has been proven to increase productivity, reduce stress, and improve mood. That is why it is crucial to make sure that your building has plenty of natural light.  You can achieve this by opening up windows or adding skylights to the ceiling. If you do not have enough natural light in your home, install solar panels on the roof that will generate enough electricity for most appliances (including lighting needs). Much of this planning should be done before the construction of your building. Otherwise, it becomes nearly impossible to incorporate all these changes down the line. #5 Be Careful with Lead paint Lead paint is a common health hazard, especially for children. It is a concern in older buildings and may be present in apartments, homes, schools, and workplaces. For people with young children or those who are pregnant, it is best to avoid living in an apartment that was built before 1978. That was when lead was banned from being used as an ingredient in paints. Make sure to test your home for lead before letting tenants in. You can also test the house yourself by taking samples of dust from floors with a vacuum cleaner bag. If there is lead on these surfaces, it will show up when you shake out the bag outside or on a newspaper inside the house. Sustainable living in an urban setting is difficult to ensure. However, keeping these points in mind will surely help you in this regard.

Read More »

Kitchen Radiator Trends in 2022

 The function of the radiator is to heat our home space. For decades the radiator design has stayed the same, with almost any changes made to its design. But nowadays, we are often seeing radiator brands that have decided to review their style and make it more elegant and sophisticated looking to fit with every interior style. Radiators are now stylish and come in many designs, sizes, and shapes. Whether freestanding or mounted on a wall, they are now real design objects and play a big part in every interior. Today we will talk about the kitchen radiator trends in 2022. Mirror, mirror on the wall Yes, the mirror you see on that wall is not just a mirror but a mirror radiator. Mirror radiators are radiators with a built-in mirror and give you the two-in-one effect of heating your home and decorating it. This genius idea allows the radiator to dissipate the light, optically make your space bigger and heat it simultaneously. They have a sleek design and can be found as a mirror only or a mirror with a metal tube on the side and can be placed vertically and horizontally. Mirror radiators can be used in all types of spaces and are perfect for placing in smaller spaces such as corridors, bathrooms, and kitchens, especially in small and dark kitchens.  Since this type of radiator is very discreet and minimal, it will look great in clean interior designs such as Scandinavian and Minimalist, but of course, it can also be implemented in other interior designs. We love the Trade Radiators kitchen radiator selection, and we are sure you will love it too, so make sure to check the link below. Browse Kitchen Radiators here. Cast Iron Radiator Cast iron radiators, usually called traditional or classic radiators, are beautiful, often decorated with detailed ornaments. They come in many different styles, such as Victorian, Georgian, and Edwardian and are often vintage, traditional and old-fashioned. These beautiful radiators can create the perfect statement piece in your home and elevate its interior. They match best with more opulent and luscious interior designs, such as Vintage, Traditional, French Country, Shabby Chick, Bohemian and even Transitional. They never go out of style and will look good and fashionable even after decades. Is this a picture? Picture radiators or art radiators look like a work of art. They look like a picture, and when you see them for the first time, you might be like the many others who got fooled. These radiators can be energy efficient infra-red or ‘wet central heating. Both options can offer a stunning focal point and add life and colour to your home, making it look more stylish. You can also get a customised radiator and pick a picture that will best match your style. Why not go for a picture of someone you love or a painting of your favourite artist? Or another idea is to put it in the dining area of your kitchen instead of a picture. We think they can look great in every room and interior style and allow you to experiment and play with your imagination. Sculpture Radiators Art radiators or sculpture radiators are a big thing right now. They are out of the ordinary, modern, artistic, and even futuristic. There are so many shapes, colours, and sizes. You can even find designs that look like a piece of actual wooden furniture which can look great in your kitchen. Some can even be placed on a table and fool for a real decoration. The most popular shapes are ladder shapes, clothes hangers, towel warmers, clothing racks, screen separators, benches, mirrors and sculptures. You will find great choices for the kid’s room, modern bathroom, kitchens, and all around the home. These choices are perfect for the modern loft – wall-hung radiators fit nicely with cement walls. If you’re considering a designer radiator for your home, look no further, this is the best choice you can make. To put it in a nutshell, As you can see, radiators have become much more than just a heating body. They are now a work of art, a fashion statement for your home and even an easy way to refresh your interior and add something unique to your home decor. Nowadays, we have so much choice, which allows us to play with our imagination and sense of style. We are far behind the boring rules that state every room should have a matching interior, so you don’t have to stick to just one radiator style for your home. You can use something different in every room. We hope you found our blog interesting and useful.


Read More »

Tips on How to Prepare & Maintain Your Lawn for the Summer Season

Summer officially begins on June 21 in the Northern Hemisphere, so there’s still some time to prepare your lawn for the hottest days ahead. Ideally, you’d want to start this process in early spring (or whenever soil temperatures rise to about 65 degrees Fahrenheit), but better late than never, right? Taking the necessary steps to prepare your lawn for a new season allows the grass to get all of the nutrients it needs to thrive all season long. This is especially important since summer is the hottest season, and it can really dry out your grass. Here are the steps you need to take to prepare your lawn for summer. Preparing Your Lawn for Summer Water Your Lawn Because it’s getting warmer, you’re going to need to water your lawn once every week. Make sure the grass is saturated with about one inch of water, and water either in the morning or in the evening to avoid the ground drying out too quickly. Also, if it rains a lot where you live, you may not need to water your lawn as frequently. Watering your lawn is just one of the steps to maintaining a lush green lawn this summer. Seed/Reseed Your Grass Some areas of your lawn may need to be reseeded, particularly if there are barren patches around your yard. Start by spreading some fertilizer on the bare spots, then go over with the seeds. Just keep in mind that any seeding/reseeding is best done in early spring. Doing so in late spring may not guarantee full grass coverage. Mow Your Lawn This tip is probably a no-brainer since the majority of people mow their lawns. However, it’s important to know the correct way to mow your lawn for each season. For instance, grass shouldn’t be cut any more than one third of the way, and raising the cutting height on your lawn mower helps keep the soil shaded. Also, regularly mowing your lawn throughout the springtime will help make the roots stronger. Fertilize Your Grass Not all lawn grasses are the same, so fertilization before and during summer will look different for everyone. For example, warm-season grasses need a nitrogen-rich fertilizer in early spring and late summer, whereas cool-season grasses will need less nitrogen in early spring and a higher nitrogen content in the early fall. Dethatch Your Lawn The colder months allow for more thatch (dead leaves, grass, weeds, and other debris) to build up on your lawn, so you’ll need to make sure you remove it before mowing, fertilizing, and watering. The reason is because thatch blocks sunlight, water, and other nutrients your grass needs to thrive. All you need is a dethatching rake to remove this debris, but remember to rake in only one direction to avoid damaging the roots. Balance the Acidity of Your Grass Sometimes even fertilizing your grass doesn’t make your lawn lush, and the reason behind this may be that your soil is too acidic. The proper pH level for soil is between 6 and 7, and you can check this with an at-home soil tester. If your soil level is below a 6, you’ll need to purchase lime and a rotary spreader to treat your soil. Aerate Your Lawn Aeration is the process of loosening compacted soil to allow water, sunlight, and other nutrients to penetrate the soil better. You should aerate your lawn right after dethatching for the best results. This can be a tricky task, so contact a professional lawn service that specializes in aeration if you have no idea where to start. Maintaining Your Lawn Through Summer Depending on the type of grass you have, you may need to do more or less lawn maintenance over the summer. Warm-season grasses usually need the most maintenance throughout the summer months, so here’s what you need to do: Set your lawn mower blades about one inch higher and mow more frequently. Continue to water once a week unless it gets really rainy throughout the summer. Fertilize every month or every other month (about every 4-8 weeks).  Don’t think that it’s impossible for you to have a lush green lawn for your summer barbecues, picnics, or pool parties— because it is possible! However, if you are experiencing serious problems with your lawn it’s best to have a professional lawn care service check it out and help you determine the cause of the problem and a solution.

Read More »

Useful Tips for Decluttering Your Home Before Moving

There is a lot of preparation and work to be done before and during moving home. However, it can be the perfect time to declutter, as you don’t want to waste time and money by bringing items with you that you no longer use. Decluttering is even more important if you are downsizing, for example moving from a large home to a smaller one such as a Condo in Naples, Florida.   Here are some ways to get started. Take one room at a time Taking one room at a time can make the task of decluttering less daunting. Trying to do the whole place in one go will be more time-consuming and is usually less efficient. Moreover once a room is “done” you’ll get a sense of accomplishment and be more motivated to move on to the next room. Get a professional to uninstall anything If you’ve had anything installed in your home, which you intend to take with you, getting a professional to do this is the best approach. It prevents damage to the item and also the structure of your old home. The last thing you want is to cause damage to a place you have already sold. Test anything you haven’t used in a while You can narrow down what you take with you by testing items you haven’t used in a while. For example, you could check if electrical items still work, or try on clothes to see if they still fit. Then ask yourself if you might use any of these again in the future. Try to be realistic. It’s tempting to hold on to things you think you might use again, but the longer they have been out of use, the more unlikely it is that you will ever need them. Shred paperwork you no longer need Most of us have a stack of out-of-date paperwork. We worry about identity theft, so put these aside to safely dispose of later, but never get around to it. Before moving, you might need to set aside several hours to shred all this paperwork, depending on how much you have. Most documents are now available online, so you could find you need very few paper documents. Sell or donate your unwanted items Some items will simply need throwing in the bin. However, there will be plenty of items that are in good and usable condition, but you have no more use for them. It can be worth selling some of these to help fund your move, but many more will only bring in a few dollars each. You probably won’t want to spend a lot of time selling these. Instead, you could donate them to a charity shop, where the money raised goes to a good cause, and the buyers pick up a bargain on something they will use. The important thing to remember when decluttering is to be a little more ruthless if you find yourself holding on to things you are unlikely to use. Nobody wants to make more work for themselves by packing and unpacking items they’re never going to use.

Read More »

Should You Build Your Own Greenhouse?

There are many individuals who decide to build their own greenhouse – but this can often be quite a challenging endeavour, especially for those who don’t have much experience in this type of project. From the materials, to leveraging; there are typically several things that you’ll need to consider before putting one up in your garden. For those who want an easier experience, buying a kit will often be the best solution. It’s simple and often cost-effective too, which only helps to make it an even better choice. Even so, you may still be unsure of what to do. Let’s take a closer look at some of the important things to consider when choosing between a DIY project and purchasing a pre-made greenhouse kit.  Want to buy? Make sure you buy from a reputable manufacturer First things first, if you do plan on purchasing a greenhouse, you should make sure that you’re getting a product that’s good quality and meets your requirements. If you decide to purchase a greenhouse from Hall, you’re likely to find that there are a variety of good kits to choose from, with plenty of variety too. This is perfect for those who already have an idea of what style and size they’re in need of – but even if you’re unsure, you could always take a look at their range and decide which one you like the most. What are the pros and cons of building your own? There are typically a few things that DIY enthusiasts will find beneficial about building their own greenhouse – but also a few factors that may be less than ideal. The costs For example, you could save quite a bit of money when using recycled materials, but this doesn’t mean that the project will be more cost-effective overall. You may find that modifying an existing structure into a leveraged greenhouse may work out to be a little more expensive despite half of the work already being done, and getting building permits could come at a price. This could end up balancing out the cost a little more. Options for customisation One positive aspect of customisation is that you can choose what materials you use. While it may not always be easy to find everything you need in one trip, it could be a bonus to be able to pick and choose all the individual aspects as you go along. With more options to customise your greenhouse, you can also custom-fit it to your garden’s unique needs.  Time and effort Of course, you will need to be considerate of all the work that will go into installing a greenhouse. From sourcing the materials, to preparing your garden; there’s often a lot that you’ll need to do yourself, even when hiring somebody to undertake the build. What are the pros and cons of buying a kit? In general, buying a good quality greenhouse kit will solve a lot of the issues that many people have when going the do-it-yourself route. You may want to keep the following points in mind: Taking the easy option If you do decide to build your own greenhouse, it may be far better to opt for a kit, as you’ll generally find that the building process will be so much simpler and will take far less time to complete. This generally comes at the cost of being less customisable, which means that it may not be ideal for those who have very specific and unusual requirements. However, with a variety of kits in many shapes, sizes and styles, it usually won’t be too hard to find something that works for you. Quality guaranteed While you won’t necessarily have as many options when it comes to materials, it is worth noting that you won’t have to worry about them either. From a good manufacturer, you can generally enjoy quality throughout, with everything being cut to the right measurements. You may even find some parts pre-assembled and instructions to ensure that the building process goes as smoothly as possible. Save money and avoid risks All in all, considering all the different costs of a DIY greenhouse, you’ll usually be able to save money with a kit. While those on a tight budget could cut corners building their own, it isn’t usually going to be worth the risk. Alongside all this, you should also get a warranty when you purchase a good greenhouse. Typically, a manufactured greenhouse will come with at least some form of protection if something should go wrong (often relating to factory defects or similar issues), which at least gives you the opportunity to get a refund or a new one if anything goes awry. When constructing your own, you won’t get this luxury and will have to pay out for any damages yourself. Which one is best? With all the facts laid out, we can see that there are both positive and negative aspects to both. The best thing you can do is consider which one will be the most beneficial to you. If you’re looking to minimise risks, reduce the amount of work needed and potentially save some cash in the process, buying a kit might be the right way to go. Unless you really want to get involved with a project or need to tailor your greenhouse to your garden, it’ll generally be best to go for a kit. While DIY greenhouses do have their benefits, most will find that it’s simply not worth it in the long run. Building Design and Construction Magazine | The Home of Construction & Property News

Read More »

Architectural Designer Resume

Do you enjoy envisioning spaces to make them functional and attractive? If yes, you should consider becoming an architectural designer. Some of the responsibilities of an architectural designer include coming up with ideas for homes and buildings. To get a job, you’ll have to write an architectural designer resume. In this post, we are going to share with you a few important tips that you should use when writing an architectural designer resume and an example to help you land your dream job and achieve your career goals. If you’ve been wondering what an architectural designer’s resume is, you are in the right place. It is a document that describes and summarizes your experience, qualifications, and history in designing structures. It describes the projects that you’ve worked on and the skills that you possess. This includes internships, training, work history, classroom projects, and coursework that focuses on building design, architecture, landscaping, and interior design. Is there a difference between a designer and an architect? Architectural designers and architects play an important role in designing buildings. Architects are professionals who have passed a thorough exam and have registered with a board to validate that they possess the required skills. They design and oversee the construction of projects. On the other hand, an architectural designer comes up with plans that are focused on the appearance of a building. Their titles aren’t protected. Therefore, they don’t have strict qualifications. You can work as an architectural designer before you apply for an architect license. Architects and architectural designers usually work together on projects. Here are a few simple rules to follow when writing an architectural designer resume. If you can’t do the work, you should consider hiring professional resume writers. 1.      Have a clear header Your resume should have a clear header that includes your details such as name, phone number, and email. Including a header in your resume is important because it helps to hire managers to contact you in case you match what they are looking for. You’ll find some templates with these fields to ensure that everything is organized. 2.      Objective After filling the header section, you need to include the resume objective section where you’ll describe the type of job that you are looking for and why you are the best person for the job. This is one of the sections that should distinguish you from other candidates. You should consider including details of your experience in the industry, the skills that you possess, and the outcomes of your work. 3.      Focus on your experience Your resume should have the experience section. This is where you describe your experience in designing structures. Start with the recent job or title that you had, your employer’s name, and the number of months or years that you worked. List the positions that relate to the job that you are applying for. Think of the goals that you managed to achieve. Seeking help from resume writing services will help you focus on your creativity in construction. 4.      List your skills You need to make a list of the skills that are relevant to the job that you are applying for. If you are experienced in various types of design programs, write them down by name for your employer to know whether you’ll need training or not if they choose to hire you. Write down your experience with designing various types of structures and how you adapt in the field. 5.      Education Your resume needs to have a section where you discuss your education qualifications. The education section can be placed at the beginning or end of your document depending on how it’s linked to your career path. For instance, if you studied architecture in college, you should place this section after your objective. On the other hand, if you want your employer to focus on work experience, place it at the end. Working with professional cv writing service will greatly increase your chances of getting hired. 6.      Include extra qualifications If other qualifications will help you stand out and get hired, you should consider creating additional sections and highlighting them. The best professional resume writers will help you with this. For instance, if you are a member of a professional body, you should include a section in your document to highlight this. Template Resume Name Email Phone Number Home Address Career Objective Work experience Job title Name of employer and date of employment Duties Skills Education Certificate School name and date of graduation Licenses (List the licenses that you have) Conclusion Writing a resume that stands out is not easy. However, using the tips that we’ve discussed here will help you land your dream job and achieve your career goals. Always keep things simple because no recruiter wants to spend extra time reading a single document.

Read More »

Which Timber Cladding is Best for Your Garden?

Timber cladding comes in a wide variety of species and finishes, making it confusing to choose the best one for your shed or garden room. The ideal choice would be able to blend beauty with durability. In addition, you’ll want to pick cladding that can stand the test of time. Durable materials may be expensive, but they add better value to your investment. Here are some of your best options in terms of profiles and materials. Profiles Shiplap. Ideal for rainy climates, shiplap is a popular cladding profile that exudes timeless, versatile style. It is installed horizontally, with overlapping panels and lips that interlock to create a flat surface for weather resistance. Log lap. Log lap cladding resembles a log cabin for a rustic appeal. That means the outer profile of the timber boards is that of a log, and the weather resistance is almost the same as shiplap. Feather-edge. Also called weatherboarding, this profile uses a sawn board that is cut diagonally to produce tapered, overlapped panels similar to roof tiles. It is also fitted horizontally and is traditionally used for cladding homes. Tongue and groove. Ideal for larger sheds, this profile uses boards built from planks that slot into each other, leaving no gaps since they are interlocking. It is solid and durable and creates flat walls. This type of construction produces strong cladding among the four, though it is more costly. It is not recommendable for wet climates as it traps water inside the connections. Materials Western red cedar cladding. Cedar is durable, slowly grown, and available in various colours, from brown to red. Among North American softwood, it has one of the most extended lifespans. It is lightweight and easy to work with. It produces long, clear timber with natural, straight grains. It makes an excellent exterior cladding because it is attractive, stable, and durable. European oak cladding. Oak has long been used for cladding because of its durability compared to other hardwoods. It has a distinct grain with silver grain. Oak is a lovely cladding material for it is straight-grained. In addition, it is durable and low-maintenance, making it a popular choice for garden sheds or garden rooms. Siberian larch cladding. Siberian larch is also a durable cladding option for gardens because it is resinous. The clear annual rings account for stunning panelling, and the colour varies from pale yellow to dark brown. It is highly dense, making it more stable. It is regarded to have a nice finish, so you can stain it or leave it untreated. Lunawood cladding. Lunawood is built using thermal modification, a process that uses steam and high temperature. It results in natural, chemical-free timber that can be recycled safely. It is also stable and durable and comes in a dark brown shade. Conclusion Wood is the most popular material for garden sheds and rooms because of its natural appeal, durability, insulation property, and sustainability. In choosing the type of timber cladding, the cost, durability, and appearance are primary considerations. The abovementioned material options are recommendable because they can combine these three factors. When choosing the cladding profile, consider the climate in your location. Building Design and Construction Magazine | The Home of Construction & Property News

Read More »