

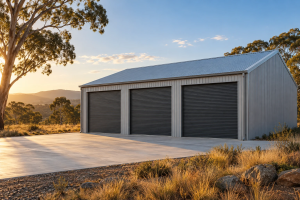
What to check before you sign a shed quote in Sydney
Two shed quotes in Sydney can sit thousands of dollars apart for what looks like the same building. A 6 x 9 m workshop in Kellyville may need different steel from the same footprint in Cronulla, and a different approval path as well. Most of that gap can be checked before you sign. 1. Make sure every quote covers the same job Ask each builder to put the inclusions in writing before you compare prices. The items that drop out of low quotes tend to be these: Watch for a kit priced against a built shed. With a kit, you organise the slab and the certification yourself, so get quotes for that work before deciding the kit is cheaper. 2. Know your site before the builder visits Sydney is in wind Region A under AS/NZS 1170.2, the Australian wind loading standard. The design wind speed still varies from block to block, because terrain and nearby buildings change it. A shed on an exposed ridge in Glenhaven takes more load than one between houses in Strathfield. Then there’s salt. Steel near breaking surf corrodes much faster than steel in Penrith, and steel makers limit their warranties by distance from the water. BlueScope, for example, sells COLORBOND Ultra steel for severe coastal sites. Ask which product is in each quote and whether its warranty covers your address. Before anyone visits, write down what could change the design or the price: 3. Ask for a site-specific design, not a generic kit spec A generic kit is usually engineered for one wind category and a standard slab. Whether that is enough for your block is a question for an engineer or certifier. When you shortlist shed builders in Sydney, ask each one what wind rating and footing design they have specified for your address. Two quotes built on different assumptions can’t be compared. Fair Dinkum Builds works both out per address from its Canterbury store. Ask for an engineering certificate that names your address and states the wind classification. It should give the footing size too. No certificate before you sign? Expect the price to change once the site is assessed. 4. Check whether your shed needs council approval NSW has three approval paths for a shed. Under the State’s Codes SEPP, a small shed can be exempt development and need no approval at all, as long as it meets every standard. In residential zones that generally means 20 m² of floor area or less, a height of 3 m or less, at least 900 mm from side and rear boundaries, and a position behind the building line. Heritage items and bushfire prone land add conditions. The full list is on the NSW Planning Portal. A bigger shed that still meets the code’s standards can get a complying development certificate (CDC) from a private certifier or the council. This is usually quicker than a development application. Anything outside both needs a DA lodged with council, and a large shed in a heritage conservation area is a common case. Ask who prepares and lodges the paperwork, and whether the fees are in the quote. Some builders work out the approval path before they price the job. Get their answer in writing. A shed that turns out to need a DA can add months. 5. Check the contract terms before you pay a deposit In NSW, building a shed at your home is generally residential building work. Over $5,000, the builder needs a contractor licence, which you can look up on NSW Fair Trading’s online licence check. Over $20,000, they also need home building compensation cover before taking a deposit, and the deposit can’t exceed 10% of the contract price. Tie progress payments to stages you can see: slab poured, frame up, roof and cladding on, handover. If most of the money is due before the steel arrives, you carry the loss if the builder stops work. Read the warranty next. A steel product warranty and a builder’s workmanship guarantee are separate, with separate terms. Ask which one the headline figure refers to and what voids it. Distance from the coast is a common exclusion. So is skipped maintenance, such as never washing salt off sheltered walls. Attach every written answer to the contract.

SEGRO and Kew Launch Landmark Biodiversity Programme to Transform Slough Trading Estate
SEGRO has joined forces with Kew Reach, a partnership between the Royal Botanic Gardens, Kew and Greensphere Capital, to deliver an ambitious ten-year biodiversity enhancement programme at Slough Trading Estate, establishing a potential blueprint for integrating nature and climate resilience into industrial and logistics developments across the UK. The initiative will see the introduction of approximately 500 trees and shrubs, alongside wider ecological improvements designed to strengthen wildlife habitats, enhance green infrastructure and create a more sustainable working environment across one of Europe’s most established industrial estates. Home to more than 320 businesses employing approximately 15,000 people, Slough Trading Estate represents a major commercial and employment destination, making it an important location for demonstrating how large-scale industrial property can successfully incorporate biodiversity and environmental improvements. The programme will build upon the estate’s existing landscaped areas, improving habitat quality and connectivity while creating more attractive outdoor spaces for occupiers, employees and the surrounding community. SEGRO has appointed Kew Reach to provide specialist scientific and ecological guidance, drawing on the expertise of landscape architects, ecologists and researchers associated with the Royal Botanic Gardens, Kew. Working alongside SEGRO’s operational, management and sustainability teams, Kew Reach has assessed the estate’s existing landscape, operational requirements and environmental constraints to identify opportunities for meaningful ecological improvements. The ten-year programme will support biodiversity commitments established through the Section 106 agreement associated with the estate’s Simplified Planning Zone, agreed between SEGRO and Slough Borough Council for the period 2024 to 2034. A central focus will be the selection of planting capable of responding to changing environmental conditions, ensuring that landscaping introduced today remains resilient as temperatures, rainfall patterns and wider climate pressures evolve. Rather than focusing solely on the number of trees planted, the partnership is adopting a science-led approach to selecting species that can deliver long-term ecological benefits while supporting the practical requirements of a busy industrial estate. Jo Jackson, Director, Western Corridor at SEGRO, highlighted the importance of integrating environmental considerations into the long-term management of commercial property. “The landscapes around our buildings have an important role to play in creating places that are more resilient, more attractive and better connected to the natural environment,” she said. Jackson explained that the partnership would help SEGRO make informed decisions around planting and landscape management, delivering benefits ranging from improved biodiversity and air quality to shade, cooling and climate resilience. She also emphasised that industrial and logistics buildings are designed to operate for several decades, making it essential to consider how surrounding landscapes can continue supporting occupiers, communities and economic growth over the long term. Beyond the immediate improvements at Slough, the partnership has also developed a bespoke planting guide intended to support future landscape strategies across SEGRO’s wider UK property portfolio. The regionalised guide draws upon peer-reviewed scientific research and an assessment of more than 300 plant species against projected future climate conditions. It considers a broad range of environmental factors, including biodiversity value, drought tolerance, flood resilience, urban cooling, air quality and allergenic pollen levels. This approach will provide SEGRO’s development and property management teams with a practical framework for selecting appropriate species across different locations, ensuring that future landscaping schemes respond to regional environmental conditions. Charlie Roper, Director of Business Development at Kew Reach, said the programme demonstrates the importance of combining scientific research with practical landscape delivery. “The climate conditions many trees will experience in the coming decades will be very different from those in which they were originally selected,” he explained. “The challenge is to plant more and to plant well, using the best available science to make better decisions about what species are planted and where.” Roper added that the Slough initiative brings together climate resilience, biodiversity and practical implementation within a framework that could influence landscape strategies across SEGRO’s UK industrial portfolio. For the wider construction and commercial property sectors, the initiative reflects the increasing importance of biodiversity, sustainable landscape architecture and environmental performance within industrial development and asset management. As developers and property owners seek to reduce environmental impacts and improve the long-term resilience of their buildings, the spaces surrounding industrial facilities are becoming an increasingly important part of sustainability strategies. Green infrastructure can contribute to managing surface water, reducing urban heat, supporting wildlife and improving the quality of working environments, complementing investment in energy-efficient buildings and low-carbon infrastructure. SEGRO, which owns, manages and develops approximately 10.9 million square metres of industrial, logistics and data centre space across the UK and seven other European countries, sees the Slough programme as an opportunity to establish a more consistent and scientifically informed approach to landscape management. The initiative demonstrates how existing industrial estates can evolve beyond their traditional commercial functions, incorporating environmental improvements that support both biodiversity and long-term asset performance. By combining specialist ecological research with practical estate management, SEGRO and Kew Reach aim to demonstrate how industrial landscapes can become more resilient, environmentally valuable and attractive places to work, while providing a model for future sustainable development across the UK built environment. Building, Design & Construction Magazine | The Choice of Industry Professionals

Orka Investments acquires 249-bed PBSA scheme in Liverpool, adding a fifth Russell Group city to a UK platform of more than 2,300 beds
Orka Investments, the London-based investment manager specialising in student accommodation and hotels, has completed the acquisition of Vista Square, a 249-bed PBSA scheme in Liverpool through its joint venture with a top five global real estate investor. The deal follows the purchase of Hill View Place in Exeter earlier this month and takes the joint venture’s portfolio to 1,761 beds across five schemes. Including assets held outside the joint venture, Orka’s wider UK student housing platform now totals 2,329 beds across seven schemes. The joint venture targets income-producing schemes in Russell Group cities, bought below replacement cost, where targeted investment and active asset management can lift performance. Its strategy focuses on driving returns through operational improvements rather than relying solely on rental growth, which has returned to longer-term averages across the sector. Orka works closely with a specialist operator on each scheme, taking an active role in leasing strategy, upgrading the amenity offering and diversifying income beyond the core academic year through semester lets, January intakes and summer stays. Vista Square sits on Oldham Place, on the edge of Liverpool’s Knowledge Quarter and within walking distance of both the University of Liverpool and Liverpool John Moores University. The scheme comprises 204 self-contained studios and 45 en-suite rooms in five-bedroom cluster flats, with studios accounting for more than 80% of the units. Residents have access to a sky lounge, roof terrace, gym, sauna, cinema room, study hub and private dining room. The scheme is fully let for the 2026/27 academic year. Liverpool has the UK’s tenth largest full-time student population, at around 55,800, and more than 26,000 of those students are unable to access a purpose-built bed, according to Savills. The city’s student population has grown by 28% over the past decade, while lettings platform UniHomes ranks Liverpool as the UK’s most competitive city for student housing in 2026/27. Vista Square was part-funded through acquisition financing provided by Investec Real Estate. Investec recently financed Orka’s acquisition of Hill View Place in Exeter, reinforcing its ongoing relationship with Orka as the investment manager continues to expand its UK student accommodation platform. Philippe de Croÿ-Solre, Vice President, Investments at Orka Investments, said: “Liverpool has one of the deepest student markets in the country and students there have plenty of choice, so the gap between the best buildings and the rest keeps widening. Demand at the top of the market is moving towards newer schemes with proper amenity and good service, and towards studios in particular. Buildings that have not kept up will find it harder to let.” “At the same time, construction costs and the new building safety regime are holding back development, so much of the next generation of quality student housing will come from upgrading existing schemes. That is where we see the joint venture’s next acquisitions – buildings from earlier development waves where the location is right but the product can benefit from targeted upgrades.” Sebastian Walley, Investec Real Estate, said: “Student accommodation financing opportunities remain attractive where a disciplined borrower is acquiring a high quality asset in a catchment with strong underlying student demand. Liverpool is an established university market, with two large universities, which makes Vista Square a compelling addition to Orka’s portfolio. We are pleased to continue supporting Orka and its joint venture partner as they grow their platform across leading UK university cities.” Orka’s joint venture launched in December 2025 with three acquisitions totalling c.1,300 beds in Birmingham, Glasgow and Aberdeen. It now owns five schemes totalling more than 1,750 beds. The joint venture was advised by Simmons & Simmons (legal) and Colliers (technical and environmental due diligence). Cushman & Wakefield acted for the seller. Building, Design & Construction Magazine | The Choice of Industry Professionals

Pupils arrive at new Wester Hailes High School building
Project milestone brings school’s education estate into single state-of-the-art building Staff and pupils at Wester Hailes High School have returned from half term into their brand new school building this week, replacing four separate teaching blocks with a single, modern education facility. McLaughlin & Harvey was appointed by the Council to deliver the 800 capacity new building, which is designed around a central, bright and open atrium, bringing pupils together while connecting departments and classrooms. Each floor features a series of breakout and retreat spaces to offer pupils choice on where they want to work, socialise or take time out. Internal spaces have been decorated with warm colours and light woods to create comfortable spaces for learning and coming together. One of the existing buildings on the site – featuring catering, sports and swimming facilities – has been retained and refurbished. This block will operate as a secure community hub, with easily accessible services for local people while maintaining the safety of users. Edinburgh Leisure reopened its refurbished leisure facilities at the school earlier this month. The building also includes a range of different flexible, collaborative spaces to support staff, students and the community. Members of the community will be able to see the new facilities first hand at an open evening on Tuesday 27 October between 5pm and 7pm. The final phase of the school redevelopment project will see the remaining former buildings demolished, to be replaced with outdoor learning spaces, an urban woodland area (creating natural habitat, play spaces and a learning resource) and a community allotment that will provide growing beds, poly tunnels and picnic benches for use by the local community. Additional landscaping will also improve secure access to the school site from the Union Canal tow path. As with other recently opened buildings in the Council’s learning estate, the school has been built to Passivhaus standard, minimising energy consumption and reducing the reliance on active heating or cooling systems, ensuring sustainable and eco-friendly construction. In addition to the Passivhaus design, the new school includes other sustainable features supporting the Council to meet its sustainability commitments. This includes measures to improve the air quality and thermal performance of the building which are vital to achieving Passivhaus certification. The new school building has been designed in line with the guiding principles of the Scottish Government’s Learning Estate Strategy and is one of the projects in the second phase of the Scottish Government’s Learning Estate Investment Programme, alongside the recently opened Liberton Community Campus. Children, Education and Families Convener, Councillor James Dalgleish, said: Opening this new school building is a major landmark moment for pupils, staff and the wider community in Wester Hailes. I’m really impressed with the quality of the spaces, and the building is all set to provide a modern, sustainable learning environment designed to support young people for generations to come. This investment is about more than just education. We’ve created a valuable community asset, bringing together learning, sport and support spaces in one accessible location. Through our Living Well Locally approach, we’re creating a hub that will help strengthen and serve the community for many years ahead. Dougie McCusker, Construction Director at McLaughlin & Harvey, said: It’s fantastic to see pupils and staff enjoying the new building. Having been designed and constructed to Passivhaus standards, the facility futureproofs the school’s estate for generations to come. Operationally, we faced the challenge of building the new facility while the school was still open and in close proximity to the construction works, however, we were able to ensure disruption was kept to an absolute minimum. The hard work by the whole project team, the designers, consultants and the client was definitely worth it when you see the cutting-edge building in use today. Further information about the design of the new Wester Hailes High School can be found on the Future Schools Edinburgh website. Building, Design & Construction Magazine | The Choice of Industry Professionals

Dialight supports safe and efficient operations at new Port of Tilbury grain store
Dialight, the global leader in industrial and hazardous-location LED lighting, has supplied a complete lighting solution for a major new bulk grain storage facility at the Port of Tilbury in Essex, UK. The Tilbury Berth 43 Cefetra Bulk Grain Store was completed in July 2026 and handed over to the Port of Tilbury, part of Forth Ports, shortly afterwards. Delivered by principal contractor Harmonix Construction, the project has transformed a former open-air container depot into a purpose-built storage facility designed to support the growing demand for imported grain handling and storage. Grain storage presents particular safety and operational requirements, as airborne combustible dust can create a potentially explosive atmosphere. The internal area of the new store has therefore been designated as a Zone 22 hazardous area, requiring suitably certified lighting capable of performing consistently within a demanding industrial environment. The exposed port location also meant that luminaires needed to withstand wet, marine conditions. Dialight became involved during the early design phase after Harmonix Construction first approached the company in November 2024. Following Harmonix’s appointment as principal contractor in February 2025, Dialight developed the lighting scheme using the construction drawings and the Port of Tilbury’s specifications. The design covered the grain store, surrounding external areas and a vehicle refuelling point, with particular requirements for operational areas including the quayside. The final installation comprises more than 200 Dialight luminaires, including ProSite Floodlights, SafeSite luminaires, Emergency GRP Linears and Vigilant Bulkheads, selected to meet the different requirements across the site. The project showcases a large-scale deployment of the Zone 22 ProSite Floodlight in a hazardous-area application. An initial scheme based on 110 SafeSite High Bay luminaires was refined to 78 ProSite Floodlights. The wider range of optical distributions available with ProSite enabled Dialight’s lighting designers to reduce the number of fittings required whilst also maintaining the specified light levels. The design also needed to account for the shadowing created by the facility’s large traversing cranes, as well as the defined light levels required around the quayside and water’s edge. Careful positioning and alignment were necessary because of the building’s mounting heights, while the use of marine-grade luminaires supports performance in the exposed and wet conditions found within a port environment. Aidan Brown, UK/EIRE Sales – EMEA at Dialight, said, “The project demonstrates the value of involving the lighting manufacturer early, particularly when a facility has hazardous-area classifications and several distinct operational requirements. Working closely with Harmonix allowed us to refine the design as the project developed. By using the different optical options available with the ProSite Floodlight, we reduced the number of luminaires required within the grain store while still achieving the specified light levels. The result is a lighting scheme that combines the required safety and performance with a more efficient use of equipment, supporting long-term reliability in a demanding port environment.” Port of Tilbury is an established Dialight customer and has used the company’s ATEX-certified lighting during maintenance upgrades across existing parts of its grain terminal. Berth 43 provided the first opportunity for Dialight products to be incorporated into a new-build project at the port, allowing the environmental, safety and access requirements to be considered from the outset. Jenis Mistry, Project Engineer at the Port of Tilbury, commented, “The new grain store has been developed to provide the safe, reliable infrastructure required for this important area of our operations. Lighting needed to meet the requirements of the hazardous internal environment, the external areas and the quayside, while also being suited to the exposed conditions at the port. The completed installation provides the light levels needed across these different spaces and supports the facility’s long-term operation.” Close coordination between Dialight and Harmonix Construction continued throughout the design and delivery stages. Early product selection and advance ordering with Dialight’s factory helped ensure that the luminaires were available well before they were required on site, supporting the construction programme and installation process. David Thrower, Project Director of Harmonix Construction, added, “The successful delivery of the lighting package was supported by early engagement and a close working relationship throughout the project. Dialight responded to changes in the construction design and developed the lighting scheme in line with the Port of Tilbury’s specifications. Having the products ordered and delivered well ahead of installation also gave our team the certainty needed to plan the work effectively.” Alongside its ability to meet the project’s safety and performance requirements, the selected LED lighting provides a long-life solution for areas where access for future maintenance can be challenging. Dialight’s standard luminaires offer a rated life of more than 150,000 hours and are backed by a ten-year warranty, helping to reduce the frequency of replacement and associated maintenance interventions. Emergency lighting batteries will be included within the facility’s ongoing inspection and replacement programme. The completed project demonstrates the importance of early collaboration, clearly defined lighting requirements and appropriate product selection when designing lighting for ports, grain stores and other complex industrial facilities. By combining hazardous-area certified products with considered lighting design, the scheme provides a robust solution for the Port of Tilbury’s new grain storage operation. For more information about Dialight’s industrial and hazardous-location LED lighting solutions, visit www.dialight.com. Building, Design & Construction Magazine | The Choice of Industry Professionals

Sika UK launches SikaFiber®-200, a natural fibre alternative for concrete crack control
Sika UK has introduced SikaFiber®-200, a 100% natural, biodegradable cellulose microfibre developed to help manage plastic and drying shrinkage cracking in structural and non-structural concrete, screeds and mortars. The launch adds a natural, biodegradable cellulose-based option to Sika’s fibre reinforcement range, offering specifiers, contractors and architects an alternative to synthetic polypropylene microfibres without a change in handling or mix design. Shrinkage-related cracking during the early curing period remains a persistent issue across floors, screeds, pavements and decorative concrete work, often driven by moisture loss as fresh concrete cures. SikaFiber®-200 is designed to address this directly. The ultra-fine cellulose fibres disperse evenly through the mix, creating a three-dimensional network that supports more uniform stress distribution as the concrete cures, reducing the formation of early-age cracks. As a cellulose-based product, SikaFiber®-200 is fully biodegradable, offering a lower-impact option for projects where material sourcing and embodied carbon considerations form part of the specification process. The fibre is suitable for a range of non-structural applications, including floors and screeds, pavements and hardstandings, decorative concrete finishes, and mortars. Amy Sapien, National Fibre Manager at Sika UK, commented on the launch: “SikaFiber®-200 gives specifiers and contractors a natural alternative to polypropylene fibres, without asking them to change how they work. It disperses through the mix in exactly the same way, but offers a biodegradable option for projects where material sourcing is increasingly part of the conversation. We see this as a practical step forward for crack control, not a compromise on performance, which is why we are incredibly excited to introduce it to the market.” SikaFiber®-200 is available now. Full technical data, application guidance and the product brochure are available from Sika’s website. Building, Design & Construction Magazine | The Choice of Industry Professionals