

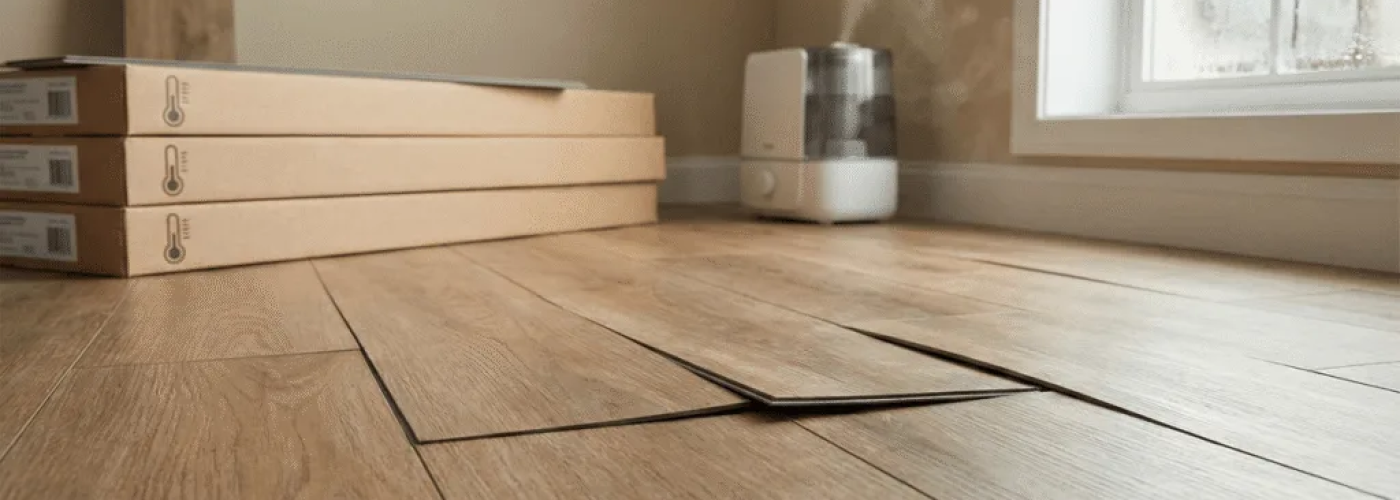


LVT can give a renovation the appearance of timber, stone or tile without using the original material, but the finished floor depends heavily on what happens before the first plank is laid. A smooth surface on day one does not compensate for moisture, movement or poor preparation underneath.
That matters whether you are refurbishing your own home, preparing a rental property or managing flooring as part of a wider fit-out. Click LVT and glue-down LVT also behave differently, so the installation method needs to be considered alongside the product, substrate and conditions in the room.
Check the Floor Before the Material Arrives
One of the easiest mistakes is treating LVT as a finish that can simply cover whatever is already there. In practice, the substrate forms part of the flooring system. What is the new floor sitting on, and do you know whether it is dry, stable and suitable for the chosen product?
Before work starts, establish what the LVT will sit on and whether preparation is needed.
- Surface condition: Look for movement, cracks, ridges, loose material and obvious uneven areas.
- Moisture: Concrete and screeded floors may need testing before resilient flooring is installed.
- Existing finishes: Old adhesive, damaged floorcoverings and unsuitable residues may need removing rather than covering.
- Installation system: Establish whether the chosen product is click LVT or glue-down LVT before planning the preparation.
If those checks show that preparation and installation need to be considered together, LVT fitting should be planned before the flooring is ordered rather than left until fitting day. Urmston Carpets supplies LVT for homes in Greater Manchester and can introduce you to an independent professional fitter for the installation.
1. Starting With an Uneven Subfloor
LVT is relatively thin compared with many other floor finishes, so the condition of the substrate can have a noticeable effect on the finished surface. Ridges, damaged boards and poorly prepared joints may remain visible or affect how the flooring performs.
Guidance from the National Institute of Carpet and Floorlayers stresses the importance of resilient flooring being installed over a subfloor that is sound, smooth, level and dry. Preparation also needs to suit the particular substrate rather than following the same process in every room.
Before the floor goes down, check the basics.
- Concrete or screed: Establish whether repairs, smoothing or moisture management are required.
- Timber floors: Check for movement, damaged boards and unsuitable joints before covering them.
- Previous flooring: Do not assume the old surface provides a suitable base simply because it looks flat.
- Local defects: Small high points and hollows are easier to deal with before the room is filled with flooring packs.
Preparation can add time to a project, but discovering a problem after installation is far more disruptive.
2. Treating Moisture as an Afterthought
A floor may look dry without being ready to receive a new covering. Residual moisture in a substrate matters with resilient flooring, so visual inspection alone is not enough where moisture could be an issue.
That makes moisture assessment part of installation planning rather than an optional extra.
- New screeds: Allow for appropriate drying and testing rather than relying only on the number of days since the screed was laid.
- Older solid floors: Establish whether moisture is present and whether further investigation or preparation is needed.
- Glue-down products: Adhesive selection and substrate moisture need to be considered together.
- Unexpected readings: Follow the flooring and preparation product manufacturers’ requirements before work continues.
The acceptable conditions depend on the flooring system and preparation products being used, so the relevant manufacturer requirements are more useful than a fixed rule of thumb.
3. Assuming Click and Glue-Down LVT Need the Same Approach
Click LVT and glue-down LVT can produce a similar visual finish, but their installation methods are not interchangeable.
Click LVT is normally assembled as a floating system, while glue-down LVT is bonded to a prepared substrate. That difference affects preparation, movement and the details around the perimeter of the room.
- Click LVT: Follow the product instructions for perimeter clearance, underlay where applicable and transitions between areas.
- Glue-down LVT: Check substrate preparation and adhesive compatibility before installation begins.
- Doorways: Decide how adjoining surfaces and changes in floor level will be finished.
- Fixed items: Establish where fixed units, thresholds and other permanent features sit before setting out the floor.
Choosing the product first and working out the installation requirements afterwards can lead to avoidable changes once the project is already under way.
4. Ignoring Site Conditions and Acclimatisation
Temperature and room conditions matter before LVT is unpacked and laid. A cold property that has been empty during winter presents a different fitting environment from an occupied room at its normal temperature.
Acclimatisation requirements vary between LVT products. Skills England lists acclimatisation of materials as part of planning for flooring installation, alongside manufacturer requirements and site conditions. The instructions for the specific LVT product should therefore determine how the material is stored and when installation can begin.
- Room conditions: Bring the space to the conditions required for installation before treating it as ready for fitting.
- Material storage: Store packs according to the manufacturer’s instructions rather than leaving them in a van, garage or unheated room.
- Heating systems: Follow the relevant instructions for changes in floor temperature around the installation period.
- Programme pressure: Do not shorten preparation simply because decorating, furniture delivery or handover is booked for the following day.
Rushing this stage can leave problems that only become apparent after the room is back in use.
5. Setting Out the Floor Too Late
Layout is not only an aesthetic decision. The starting position affects cuts at walls, the appearance of doorways and the way a plank or pattern sits across the room.
It deserves attention before adhesive is spread or the first row of a floating floor is locked together.
- Room shape: Check alcoves, chimney breasts, doorways and other interruptions before deciding where to start.
- Visible areas: Consider what the floor will look like from the main entrance to the room.
- Patterns: Herringbone and other directional layouts need more setting out than straightforward planks.
- Material allowance: Waste depends on the room, product and layout, so do not rely automatically on one fixed percentage.
Spending time on the layout before fitting begins can prevent narrow cuts at prominent walls or awkward pattern changes at doorways.
6. Leaving Heating and Finishing Details Until the End
The final details should be part of the installation plan, not decisions made once most of the floor is already in place.
Underfloor heating is a good example. The floorcovering, adhesive where used and heating system all need to be compatible. The Contract Flooring Association has published underfloor heating guidance covering key installation requirements for resilient flooring.
Finishing details deserve the same attention.
- Transitions: Decide how the LVT will meet carpet, tile or another floor covering.
- Perimeters: Follow the product instructions for movement allowances and trims.
- Doors: Check clearance after the finished floor build-up is known.
- Underfloor heating: Confirm installation and operating requirements for the chosen flooring system.
These details take up little physical space, but they are often among the most noticeable parts of the finished job.
When LVT May Not Be the Right Choice
LVT works well in many residential and refurbishment settings, but it should not be treated as the answer for every floor.
If the substrate needs extensive structural repair, the immediate priority is the floor underneath rather than the finish on top. The same applies where moisture remains unresolved.
- Major substrate movement: Resolve the cause before choosing the final floorcovering.
- Persistent moisture: Investigate and manage the source rather than relying on LVT to conceal it.
- Unsuitable site conditions: Do not install a product outside the conditions specified by its manufacturer.
- Existing floors worth retaining: In some properties, repairing an appropriate original floor may make more sense than covering it.
Sometimes the better flooring decision is to deal with the building first and return to the finished surface afterwards.
Plan the Installation Before Fitting Day
Many LVT problems are easier to prevent before the flooring arrives. Substrate condition, moisture, installation method, room layout and site conditions should all be understood before work reaches the fitting stage.
Before ordering, confirm the exact LVT product and have the existing floor assessed. Samples can then be checked in the room itself, while a professional fitter can identify preparation, transition and heating requirements before they become last-minute decisions.
Good preparation means fewer decisions have to be made once fitting is already under way.